In quite a few cases, you can see advice on using Safe Mode for malware removal. While generally good advice, this practice requires quite a bit of skill and knowledge on where to seek for malicious files. And in the selection of cases, manual approach is counterproductive, due to the complexity of the operation. But let me show you a step-by-step guide on how to remove malware in Safe Mode, that should work against the vast majority of malicious programs.
Is Safe Mode Good for Malware Removal?
Despite being quite useful for malware removal operations, Safe Mode was not meant for this kind of activities. Its main purpose is troubleshooting: in this mode, Windows starts without quite a few modules, startup programs and things planned in Task Scheduler. This, however, is exactly what prevents malicious programs from executing, since the majority of them rely on either startup or the Scheduler.
Why would one need all this during malware removal? While active, viruses may block executable files from running, or overload the system making any operations impossible to accomplish. The latter is characteristic of coin miners and, in some cases, proxyware. This makes installing antivirus and anti-malware programs nearly impossible, and Safe Mode allows omitting these problems altogether.
How To Run Windows in Safe Mode
There are several ways to enter Safe Mode, which vary depending on certain factors. One particular thing I recommend you to stick to is using Safe Mode with Networking, as it allows connecting to the Internet. If you are using Windows without a password on your user account, it will be much easier to get into Safe Mode. For Windows 10/11 without a user account password, you can follow these steps:
Method 1. Using the Restart Option
Click “Start”, click “Power”, and then click “Restart” while holding the Shift key.
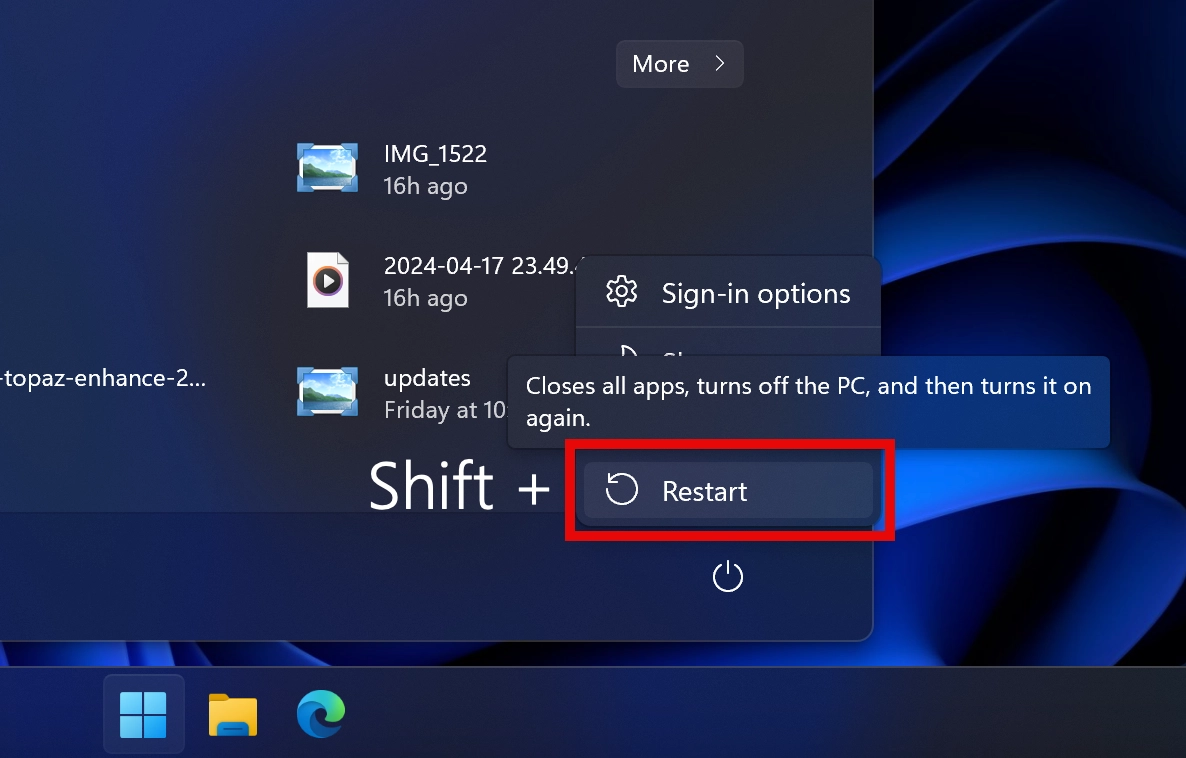
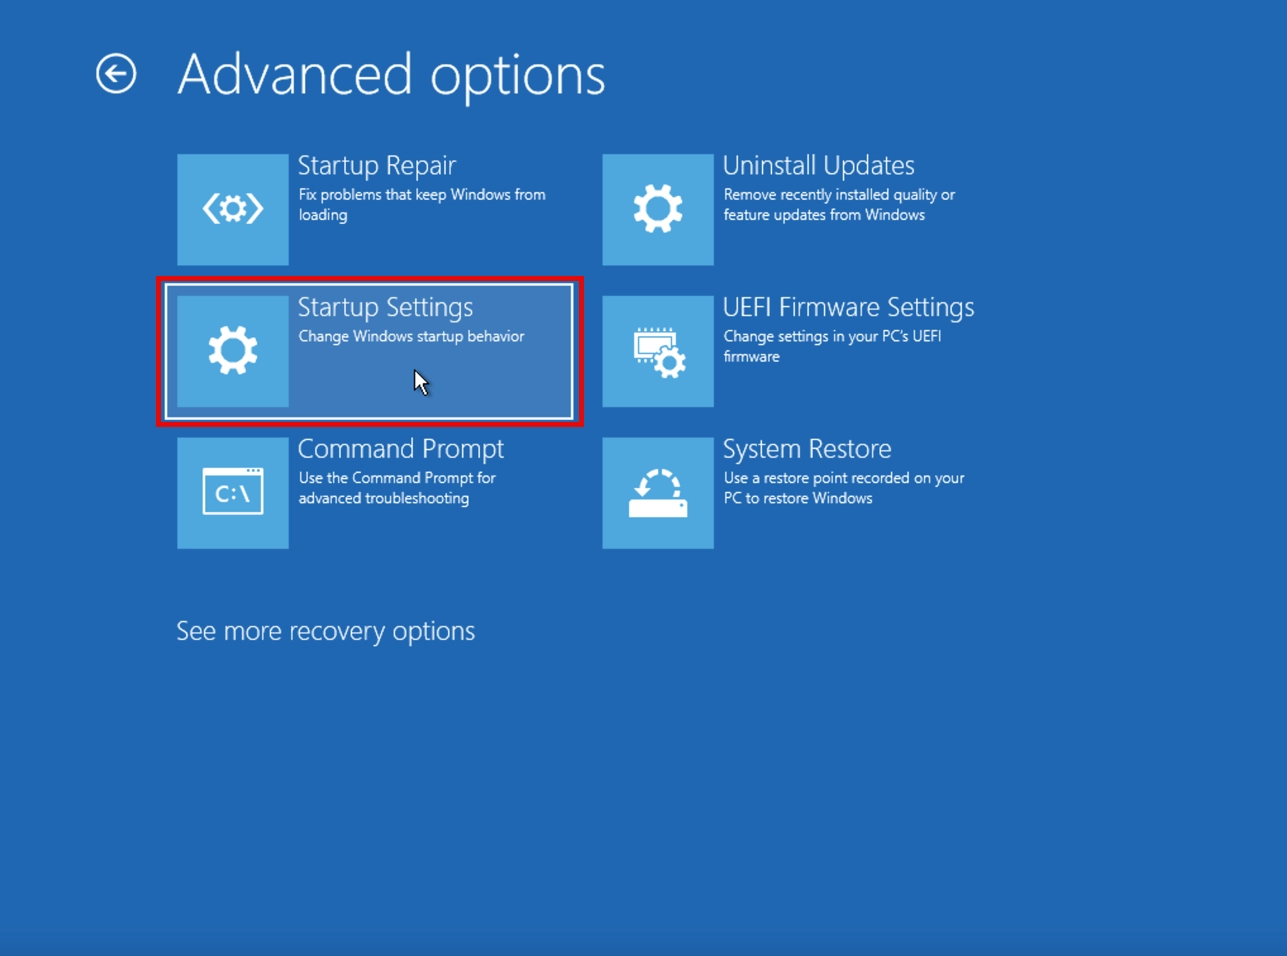
In the menu that appears, select “Troubleshoot” → “Advanced options” → “Startup Settings” → “Restart”.
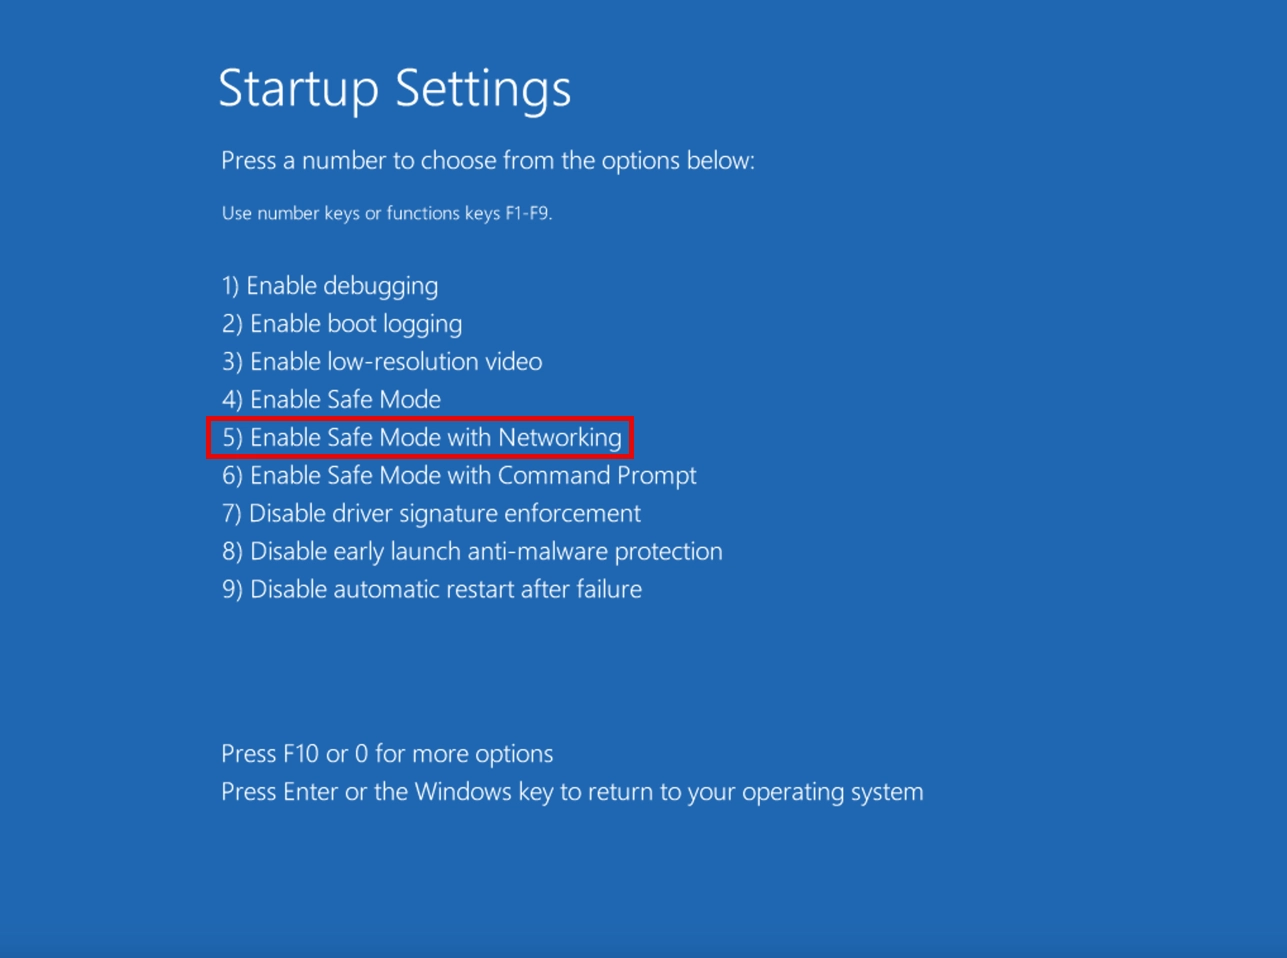
Then choose the Safe Mode with Networking and press the corresponding key (usually F4 or F5, depending on Windows version).
Method 2. Using Settings
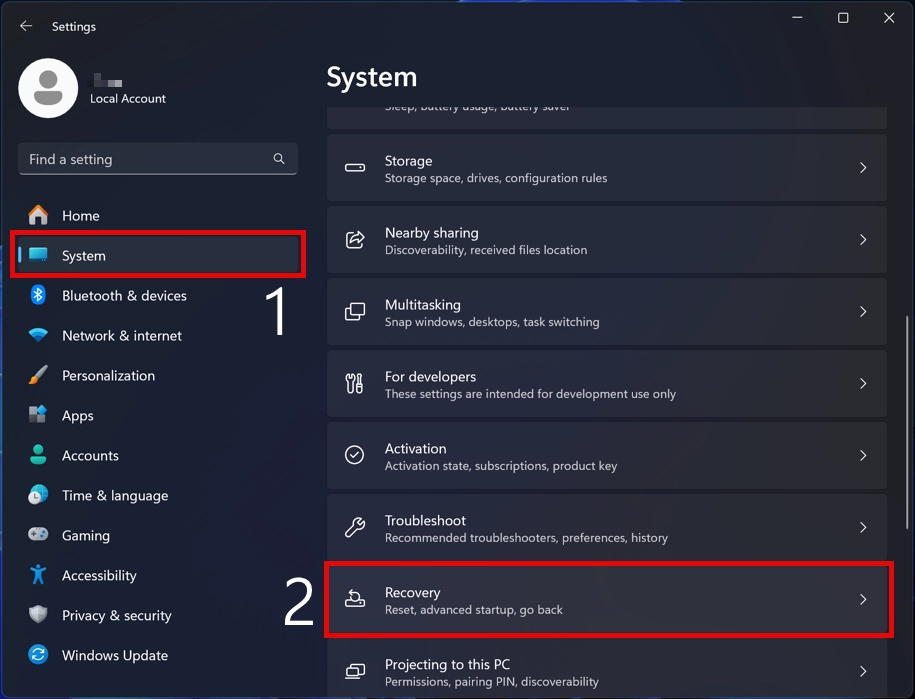
Click “Start” and open “Settings”. In the left menu, click “System”, then scroll down and click “Recovery”.
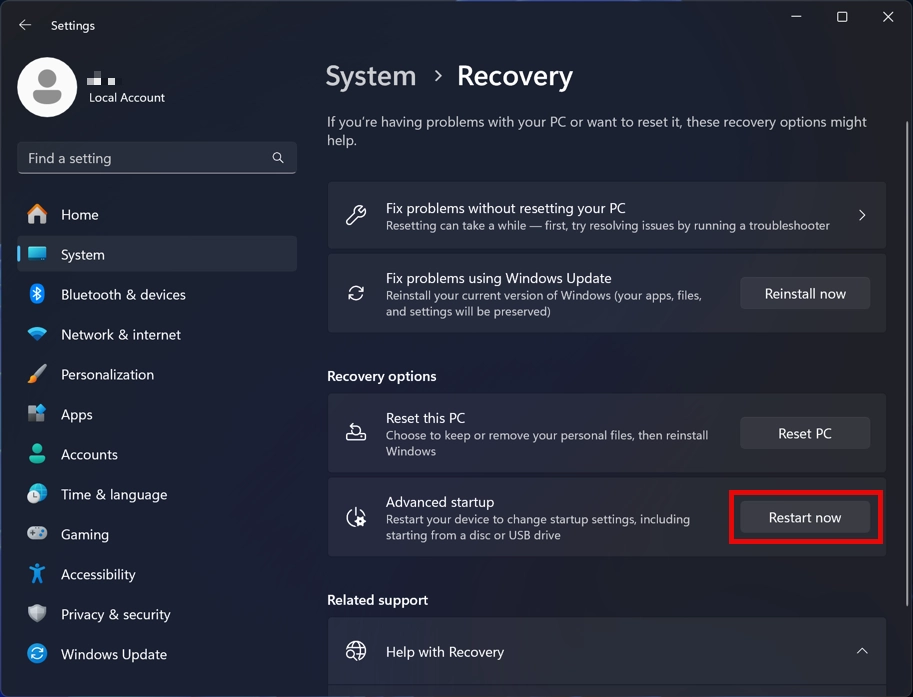
Under “Recovery options”, select “Advanced startup” and click “Restart now”. Then follow steps 2 and 3 from the first method.
Method 3. Interrupting Normal Boot
Another way to get into Safe Mode is to interrupt the normal boot process three times in a row. In case of three consecutive unsuccessful boots, the OS will automatically enter the Windows Recovery Environment (WinRE), which is useful if you are unable to start Windows for some reason. After this, follow steps 2 and 3 from the first method.
Windows with a User Account Password
If your device is protected by a user account password, you will not be able to use the previous methods. This is related to Windows security and BitLocker, which encrypts all disks. The only way to enter Safe Mode in this case is through System Configuration. Follow these steps:
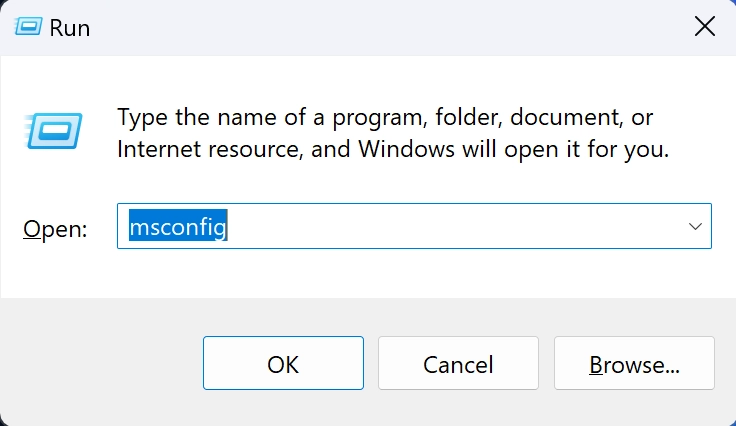
Press the Win key + R, and in the window that opens, type “msconfig”.
In the System Configuration window, go to the “Boot” tab. Under Boot options, check the “Safe boot” checkbox.
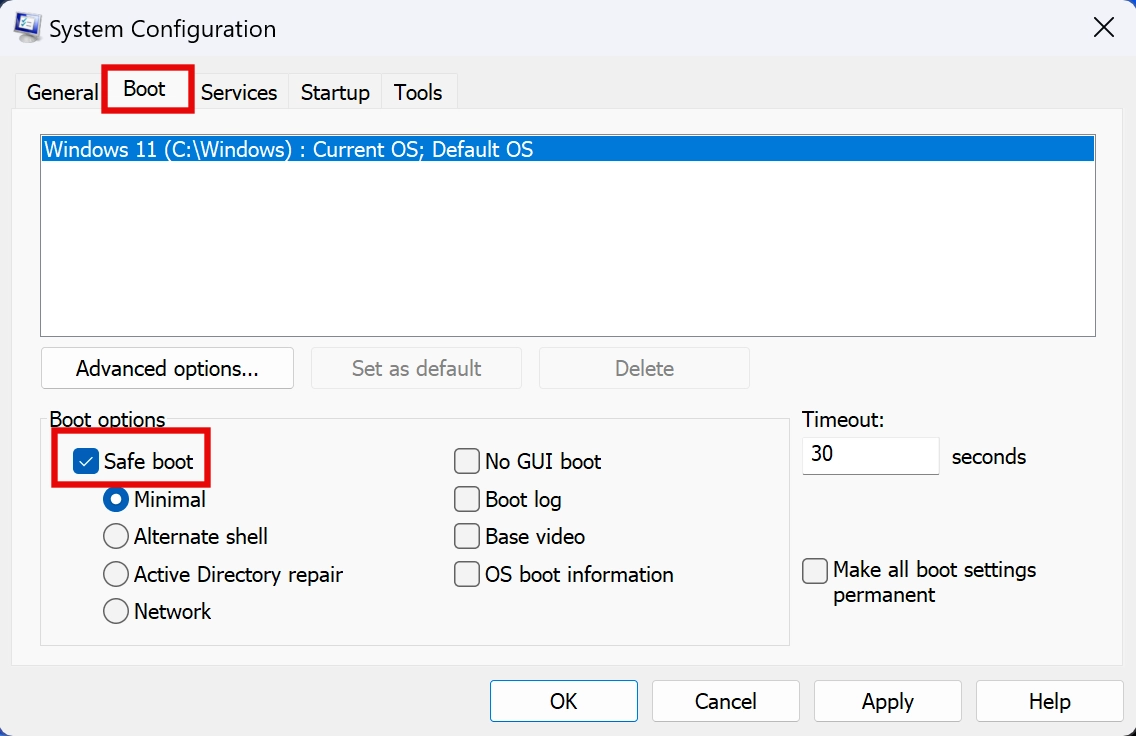
Click “Apply”, then click “Restart”. Now your system will default to booting in Safe Mode until you perform the first two steps again and uncheck the “Safe boot” checkbox.
How to Remove Malware and Viruses in Safe Mode?
If you’ve decided to remove malware from your device with the use of Safe Mode, you may need to know where to look for malware. There are several locations as well as visual signs that may help you with locating the threat. However, I still recommend combining this mode with an anti-malware scan, which I will show later.
Typically, the majority of malware follows certain patterns in where it stores its file. Knowing even a few key locations can help detect the threat in just a few clicks. Malware often uses temporary or hard-to-reach system folders, such as AppData\Roaming\Temp, root directory of AppData\Roaming, and AppData/Local. By default, these folders are hidden from the user, so you need to enable the display of hidden files in the File Explorer settings to access them.
In addition to the location, it is important to pay attention to files with strange or unfamiliar names. Malware usually uses random combinations of letters or numbers to make them look like some generic log files. Another thing to check is the digital signature certificates of the files, especially if there’s a suspiciously looking file that has a valid name. If the certificate issuance date indicates the future, or the issuer is an unrelated company, it is most definitely malware.
However, detecting and removing malware manually is not only an extremely labor-intensive process but also not always effective. Malicious programs often create copies of themselves in the system and regenerate from them after deletion. This is why using specialized tools that automatically and reliably detect and remove malware is the best solution. As mentioned earlier, Safe Mode disables most Windows services, including Microsoft Defender. It cannot be enabled until you boot the computer in standard Windows mode.
To remove malware in this mode, you need to install third-party solutions. This is why network access is necessary after entering Safe Mode—the malware might block the installation. GridinSoft Anti-Malware is an excellent solution for removing malware in Safe Mode. The detection databases of this antivirus are updated hourly; additionally, it offers a Proactive Protection feature, which protects the system in the background after a normal system boot. Combined with the overall ease of use of the program, it becomes a great option for any system.
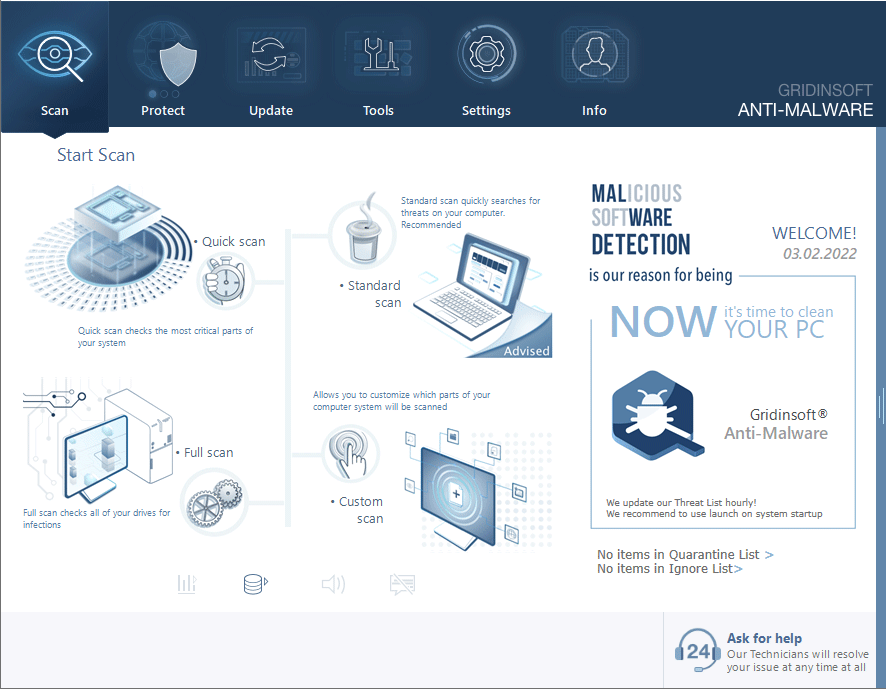
Download and install Anti-Malware by clicking the button below. After the installation, run a Full scan: this will check all the volumes present in the system, including hidden folders and system files. Scanning will take around 15 minutes.
After the scan, you will see the list of detected malicious and unwanted elements. It is possible to adjust the actions that the antimalware program does to each element: click "Advanced mode" and see the options in the drop-down menus. You can also see extended information about each detection - malware type, effects and potential source of infection.
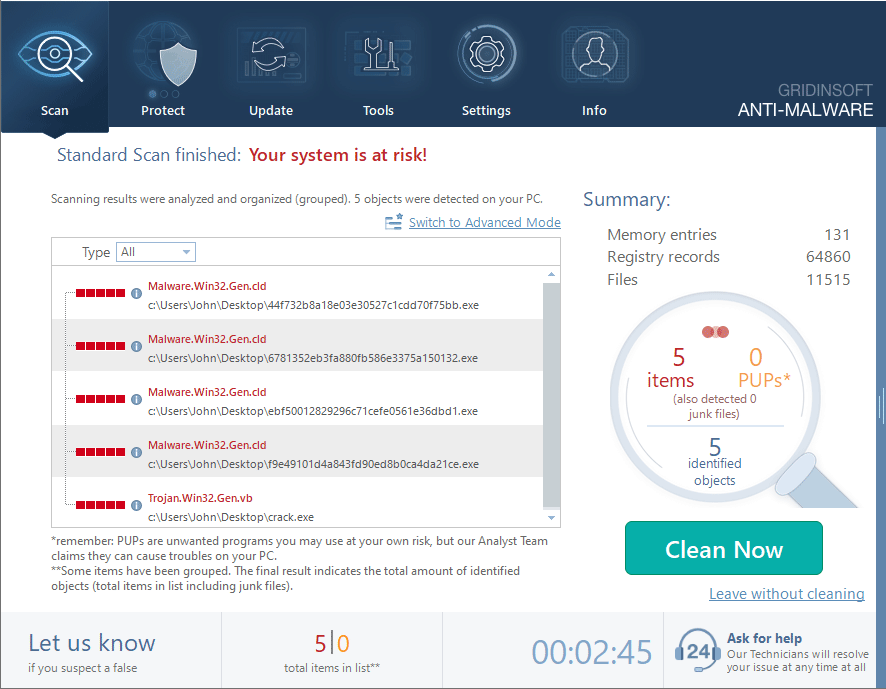
Click "Clean Now" to start the removal process. Important: removal process may take several minutes when there are a lot of detections. Do not interrupt this process, and you will get your system as clean as new.
