Sihost.exe is a crucial background process for Windows 11/10 that governs essential features like the context menu and action center. However, it can sometimes malfunction and disrupt system stability. In this article, we unravel the essence of Sihost.exe and equip you to eliminate troubles within your system.
Sihost.exe – What is It?
Windows has many background processes, each of which is responsible for something. The Sihost.exe process (Shell Infrastructure Host file) is a critical executable file that executes various system processes. This file involves the following actions: the Start menu, launching the context menu, action center, Cortana, file explorer, etc.
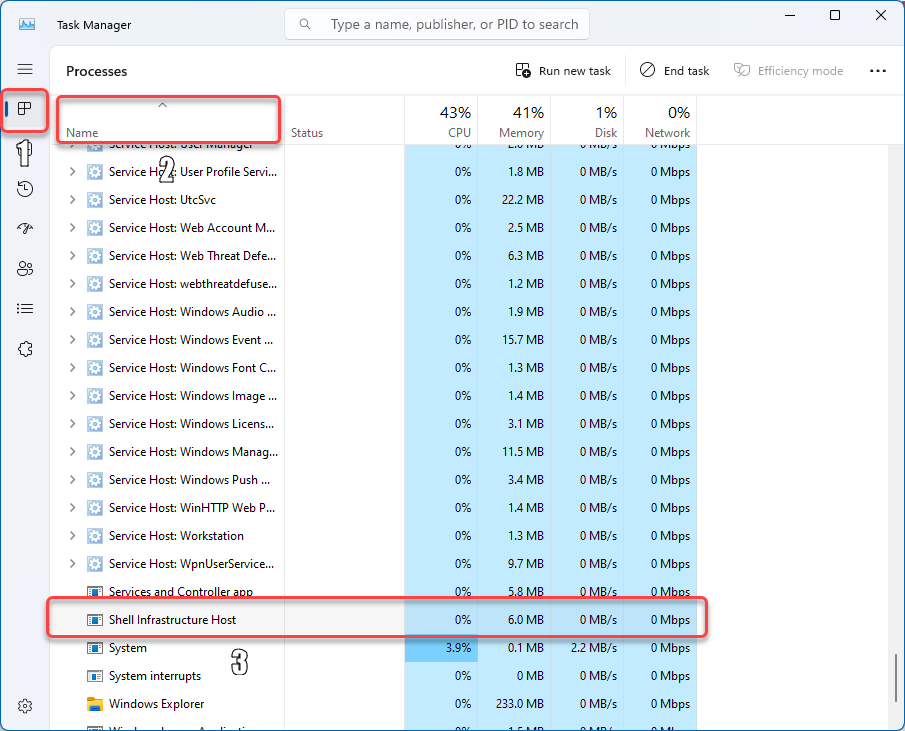
It is essential to understand that Sihost.exe is not a virus. It is a legitimate system process, which you should not stop or delete due to its importance to the system’s stability. However, its name nonetheless can be used by malware, to get a better disguise in the system. You can observe this file in Task Manager in the list of Windows processes. To do this, launch Task Manager, go to the “processes” tab, sort them by name, and scroll down to the “Windows processes” section. Then scroll down some more, and you will see “Shell Infrastructure Host“. In a normal state, this process does not load the system in any way and uses about 6 MB of RAM and miserable amounts of CPU.
| Attribute | Details |
|---|---|
| File Name | sihost.exe |
| Full Name | Shell Infrastructure Host |
| Legitimate Location | C:\Windows\System32\ |
| Developer | Microsoft Corporation |
| Normal Memory Usage | 5-10 MB |
| Normal CPU Usage | 0-1% |
| Can Be Terminated? | Not Recommended (Will Restart Automatically) |
Is Sihost Malware?
As I wrote above, malware sometimes masquerades as a legitimate Windows process, using the name of Sihost.exe in particular situations. However, even a legitimate file may consume more resources in some specific cases.
Checking Sihost.exe Location & Properties
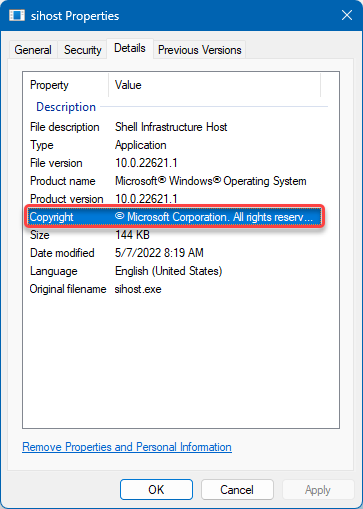
To ensure the process is legitimate, let’s review the sihost.exe instance. First, check its properties through the Task Manager. For this, click with the right mouse button and opt for “Properties.”
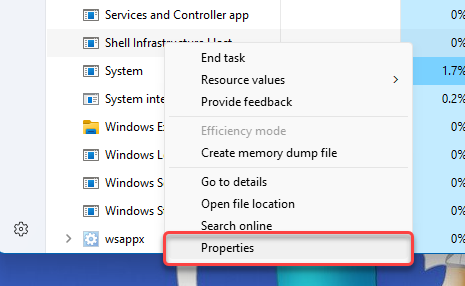
There, click on the “Details” tab and ensure it says Microsoft Corporation before copyright.
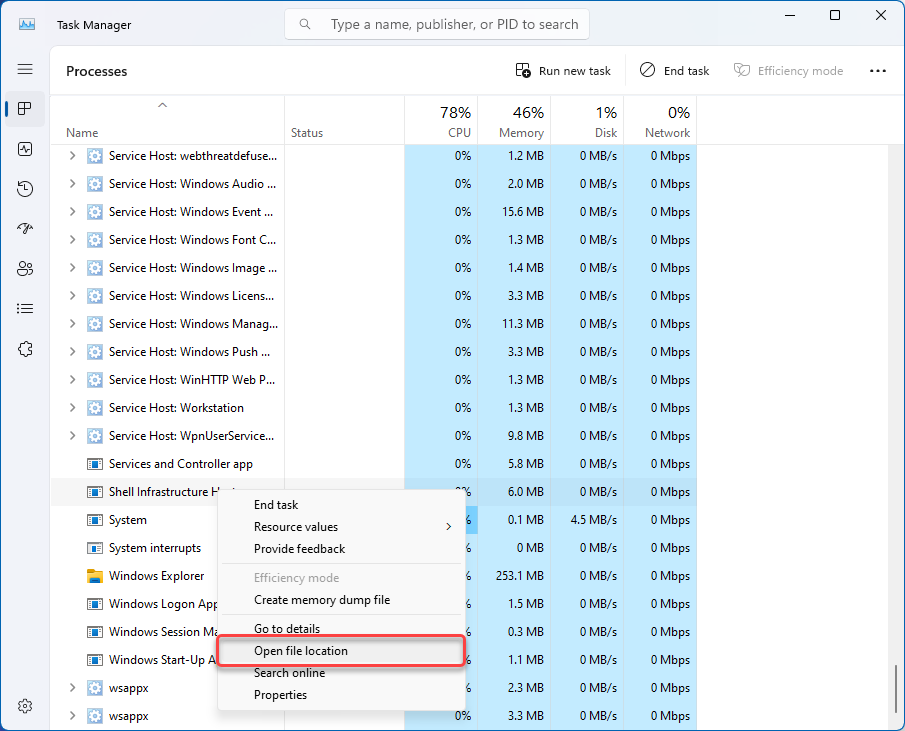
The next step is to look at the sihost.exe location. Close the previous file properties window, right-click on the process, and select “Open File Location.”
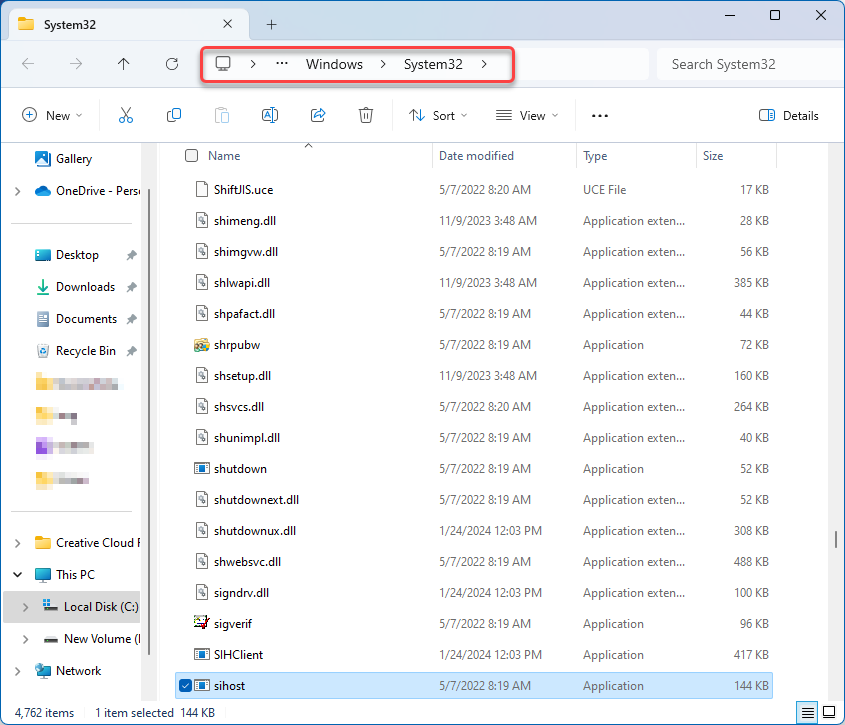
By default, the file is located at C:\Windows\System32\. If the file location differs, there is a chance that the name of Sihost is used by malware. We recommend scanning your computer with GridinSoft Anti-Malware.
Fix Sihost.exe High CPU Usage
Suppose your file is legitimate after running the tests but consumes an abnormally high amount of resources. In that case, you can perform the following steps:
1. Restart Your Computer
Reboot your PC. This is an obvious and trivial tip, but it solves a lot of problems. If the problem hasn’t gone away after rebooting or reappears after a while, move on to the next step.
2. Run System File Checker
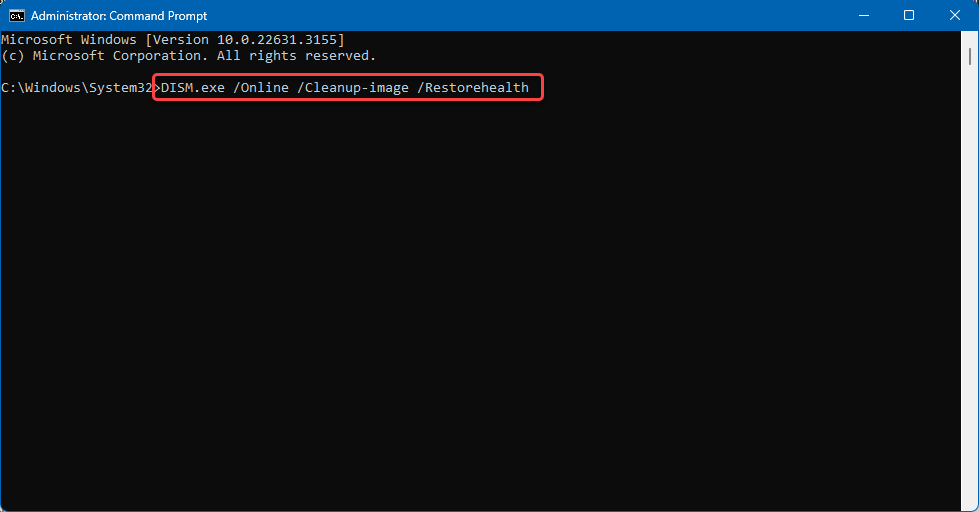
Run the System File Checker tool (SFC.exe). Some user or software actions can adversely affect system files. Restoring important system files should solve such problems. To do this, open Start and write “cmd,” then click “Run as administrator.” Next, paste the following command into the Command Prompt window:
DISM.exe /Online /Cleanup-image /Restorehealth
This action will check your system files and download them from the Windows Update Center if necessary. After DISM completes, run the SFC command:
SFC /scannow
3. Reinstall Microsoft Redistributable Packages
Reinstall Microsoft Redistributable Packages. These packages are necessary for some programs to work, but they can cause the Shell Infrastructure Host to become unstable. To do this, uninstall all installed packages, download the installation file from the Microsoft website, and reinstall it.
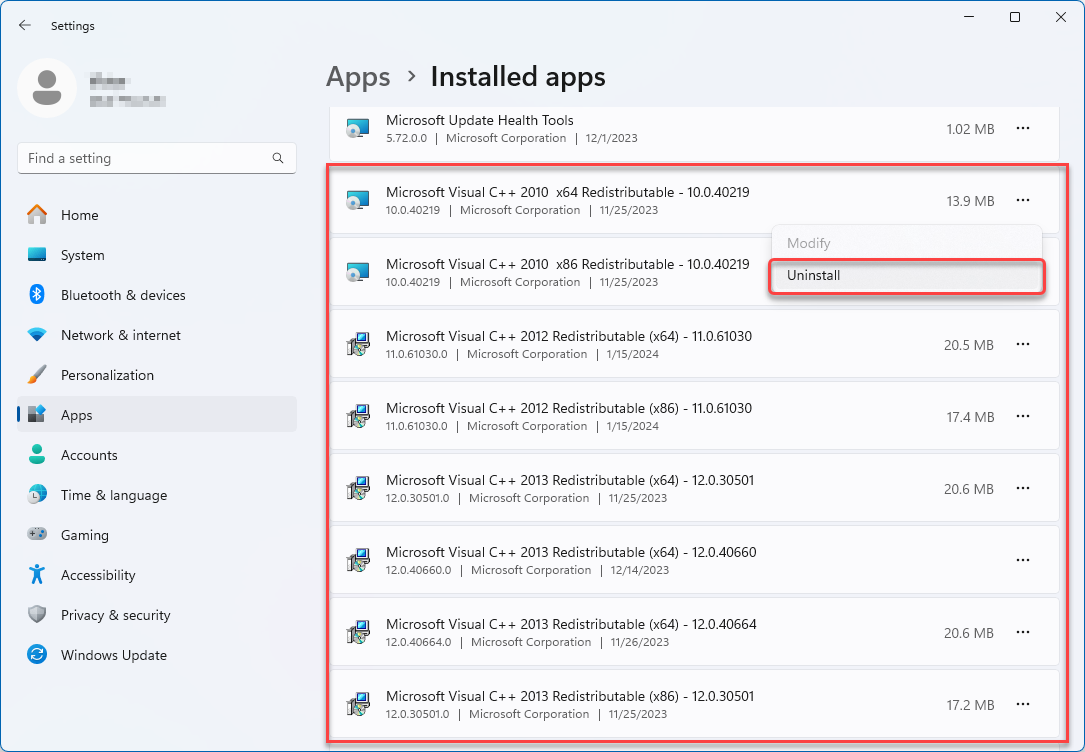
4. Reinstall the Photos App
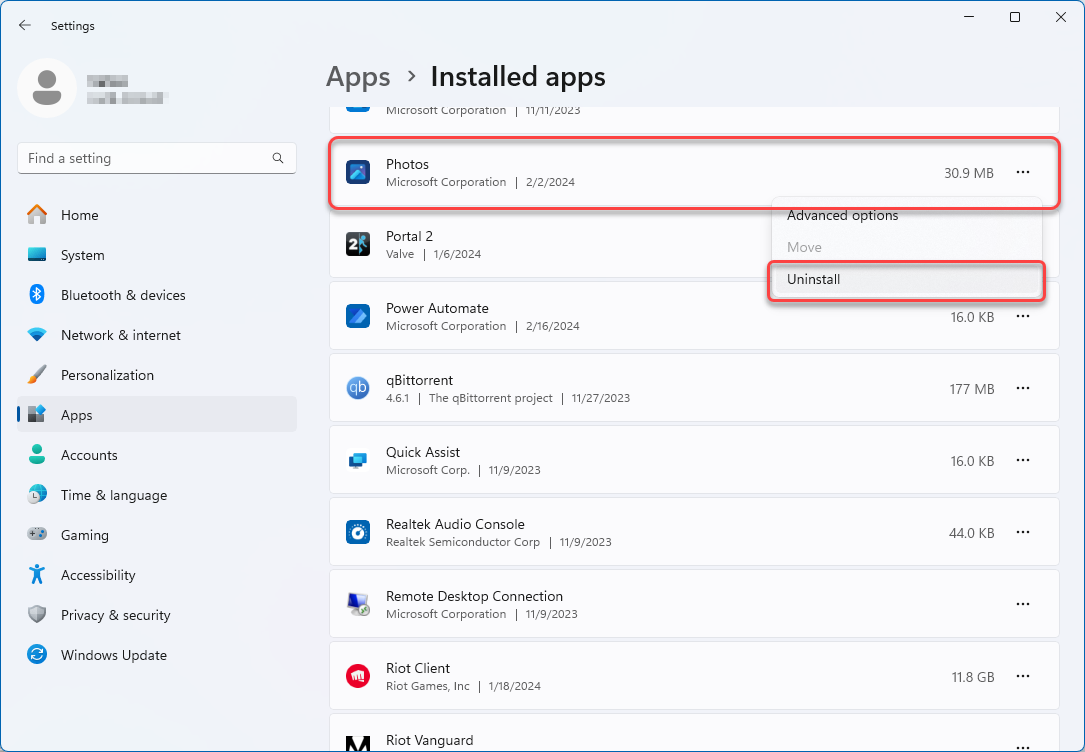
Reinstall the Photos app. Previously, a memory leak bug caused the excessive resource usage of Sihost. You can follow these steps if you encounter the same problem on your computer. First, uninstall the Photos app from your device. Then, open the Microsoft Store and download the app again. This should resolve the issue.
If the above steps do not solve the situation, I recommend running a malware scan on your system. To do this, download GridinSoft Anti-Malware and run the scan.
How to Remove Fake Sihost.exe with GridinSoft Anti-Malware
If you’ve identified a suspicious sihost.exe process that isn’t in the correct system location, it’s likely a malware infection. Follow these steps to safely remove it:
Step 1: Download and Install GridinSoft Anti-Malware
First, download GridinSoft Anti-Malware from the official website. Make sure to close all browsers before starting the installation process.
Step 2: Run a Full System Scan
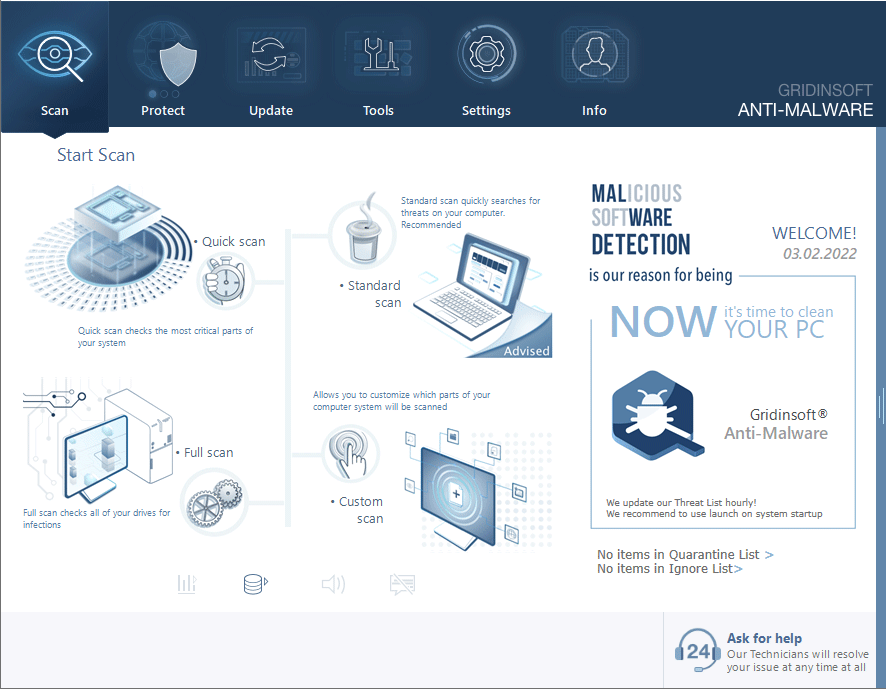
Launch GridinSoft Anti-Malware and click on the “Scan” button to begin a comprehensive system scan. This will detect any malicious files masquerading as sihost.exe as well as other potential threats.
Step 3: Remove Detected Threats
After the scan completes, you’ll see a list of detected malware and suspicious files. Review the list, paying special attention to any entries related to sihost.exe in unusual locations.
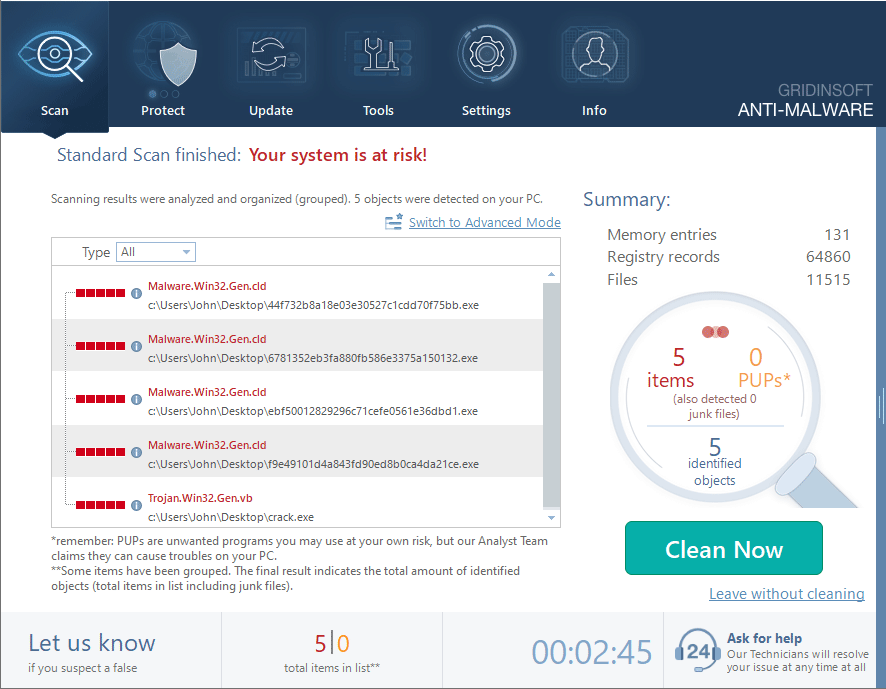
Click the “Clean Now” button to remove all detected threats. The program will guide you through the removal process and may request a system restart to complete the removal.
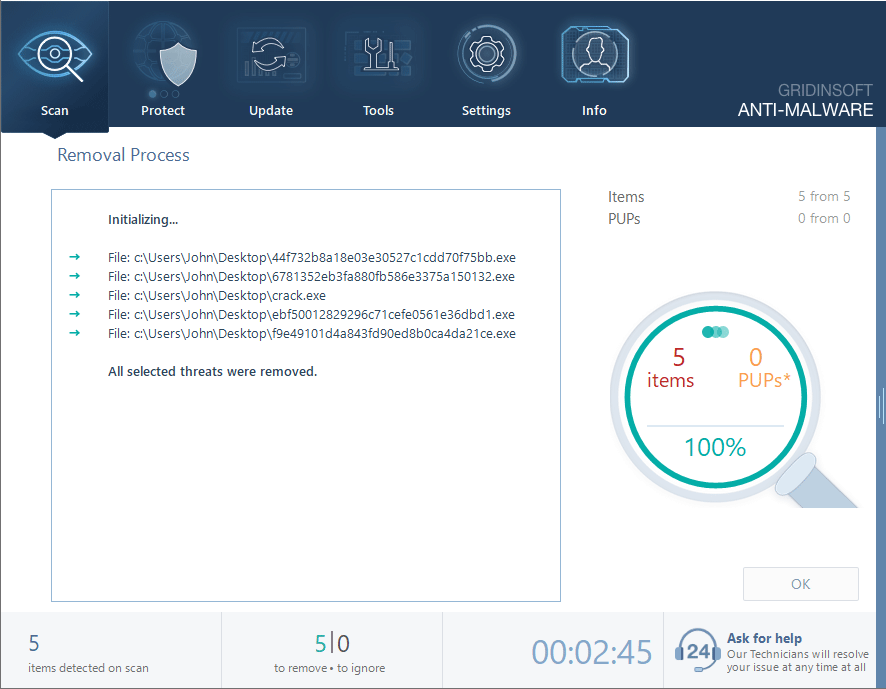
After removing the threats, verify that your system is running normally and that sihost.exe is now using an appropriate amount of resources.
Frequently Asked Questions
Is it safe to end sihost.exe in Task Manager?
No, it’s not recommended to terminate the sihost.exe process as it’s an essential Windows component. Ending this process can result in unstable system behavior, including issues with the Start menu, Action Center, and context menus. Windows will automatically restart the process if terminated, which can result in temporary visual glitches or functionality issues.
Why is sihost.exe using high CPU or memory?
Sihost.exe may use excessive resources due to several reasons: outdated or corrupted system files, conflicts with Microsoft Redistributable packages, memory leaks from the Windows Photos app, or malware disguised as sihost.exe. Running the System File Checker (SFC) tool, reinstalling Visual C++ Redistributables, or updating Windows can often resolve these issues.
How can I tell if sihost.exe is a virus?
The legitimate sihost.exe is always located in C:\Windows\System32\ and is digitally signed by Microsoft Corporation. If you find sihost.exe in any other location, or if the file properties don’t show Microsoft as the verified publisher, it’s likely malware. Always run a scan with trusted antivirus software if you suspect the file is malicious.

