Antimalware Service Executable is a system process that belongs to Windows Defender. Usually, it does not cause any issues, and the user does not notice it. In some cases, it can consume an abnormal amount of resources. I have compiled some practical solutions to address this problem in this article.
What is Antimalware Service Executable?
The Antimalware Service Executable is a core process of Microsoft Windows Defender, the built-in antivirus software in Windows. This process, also known as MsMpEng.exe, runs in the background to provide real-time protection against malware and other security threats. However, some Internet users complain that this process consumes an excessive amount of resources at times, which causes discomfort when using the PC.
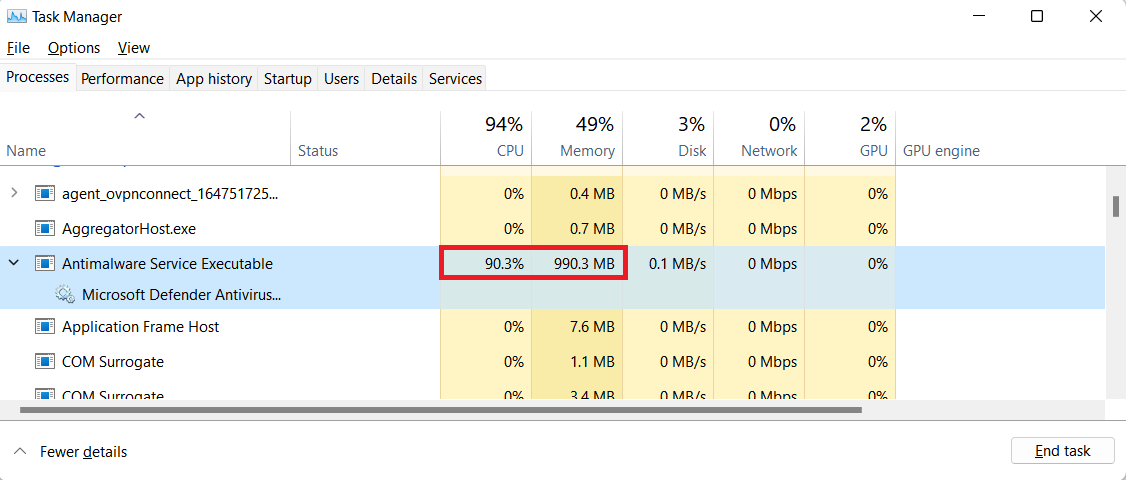
There are several factors responsible for this. First, Defender periodically performs a full scanning, analyzing every file in the system. Such a process requires a lot of resources, so some devices start to slow down. Second, like most modern anti-malware solutions, Defender uses heuristic detection to check certain elements with special attention, potentially causing temporary system slowdowns.
Although all anti-malware solutions consume a significant amount of resources during a scanning process, none of the third-party ones have an annoying habit of starting the scan sporadically. Also, due to certain bugs, it may simply hang up on a certain point of the scanning process, keeping the resource consumption high. Let me explain how to fix such a behavior.
Resolve of Antimalware Service Executable High CPU Consumption
There are several ways to solve the problem of excessive resource consumption by Defender. They are not complicated, but they do require some action from the user:
Disable Scheduled Scans in Task Scheduler
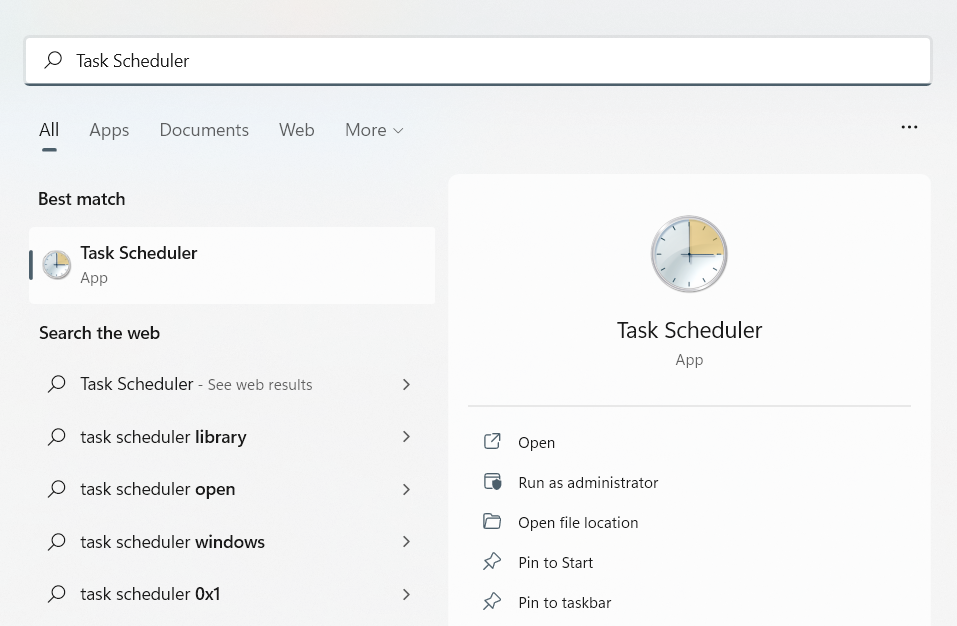
The main reason for Antimalware Service Executable high CPU consumption is that Defender runs a full scan, regardless of whether the user is actively using the device or the system is idling. The solution is to set a specific time for Defender to perform a full system scan. This is something like Active Hours in the Windows Update section, which does not apply to Defender’s activity for some reason. To change the scan schedule, press Start, type “Task Scheduler”, and open it.
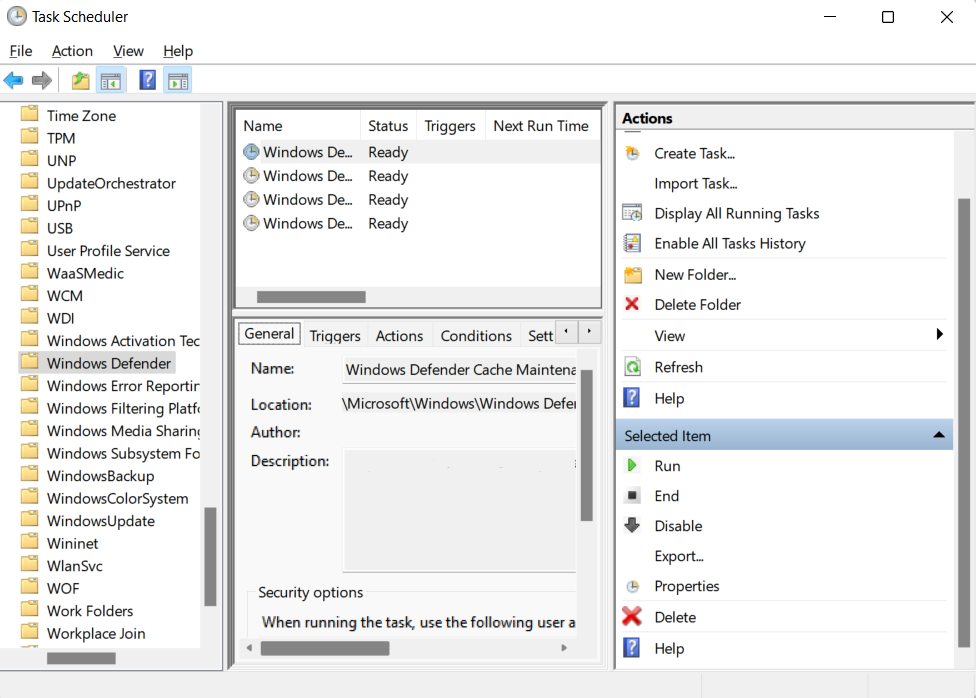
In the left pane, click Task Scheduler Library, then navigate to Library→Microsoft→Windows→Windows Defender. You will see Windows Defender Scheduled Scan, Windows Defender Cache Maintenance, Windows Defender Cleanup, and Windows Defender Verification in the middle pane as you open the Windows Defender folder. All these four services need to undergo the following procedure.
We will start with Windows Defender Scheduled Scan. Double-click on it, click the Conditions tab, and uncheck all options to clear scheduled scans.
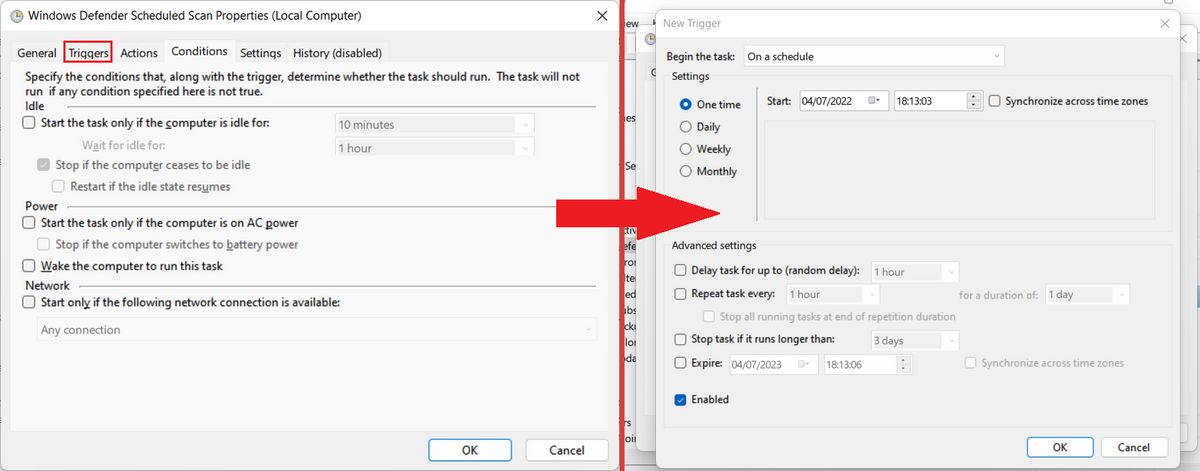
Now, you must create a trigger to call a task at a certain time. To do this, go to the “Triggers” section and click “New…”.
Select a time that will not interfere with your activities, choose “Daily”, and set how often Defender will perform the scan (by default, it is recurring every day), then click “OK”. If you do not need the scans to happen at all, you can just keep this parameter at “Disabled”. Repeat these actions for each item.
Exclude MsMpEng.exe from Scans
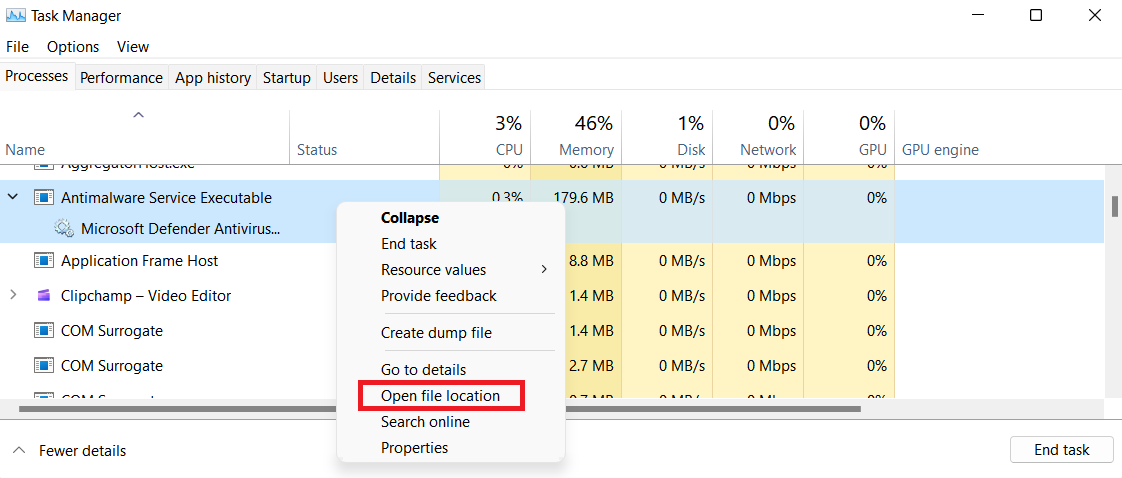
One particular place where Microsoft Defender may have issues is while scanning its own files. The ultimate privileges of this program obviously conflict with themselves when it comes to scanning its files. To fix this silly issue, open Task Manager and find Antimalware Service Executable in the processes list. Right-click on it and select Open File Location in the drop-down menu.
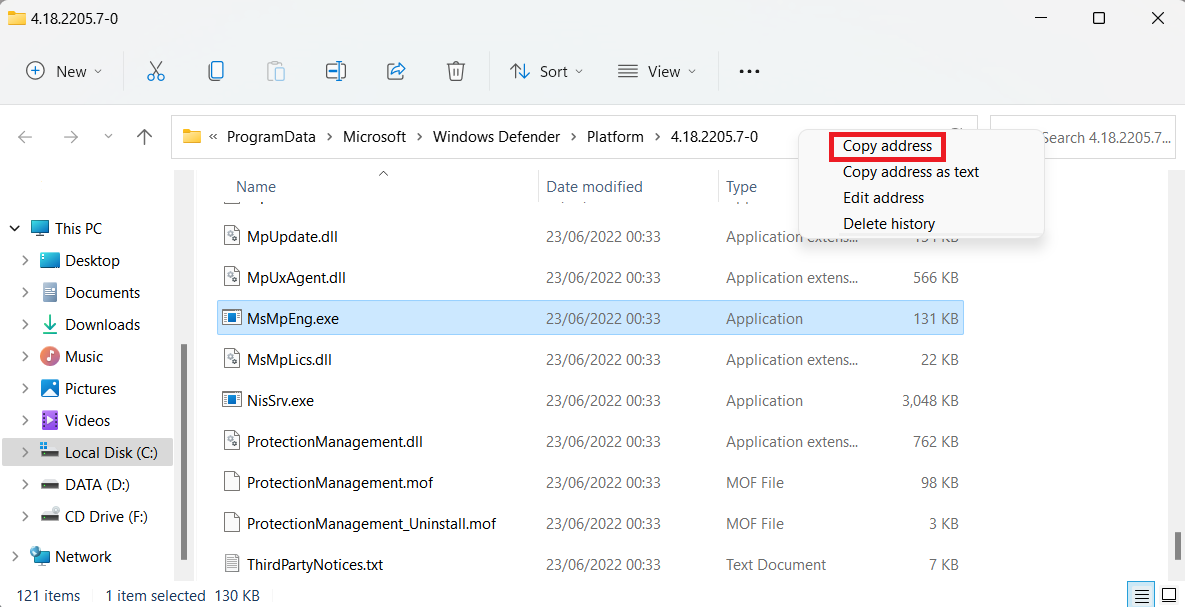
In the opened window, you need to copy the full path of the Antimalware Service Executable. Click on the address bar with the right mouse button and press “Copy path”.
Now launch Windows Defender. You can use the Start Menu search bar to input Windows Defender right there and open the first found item.
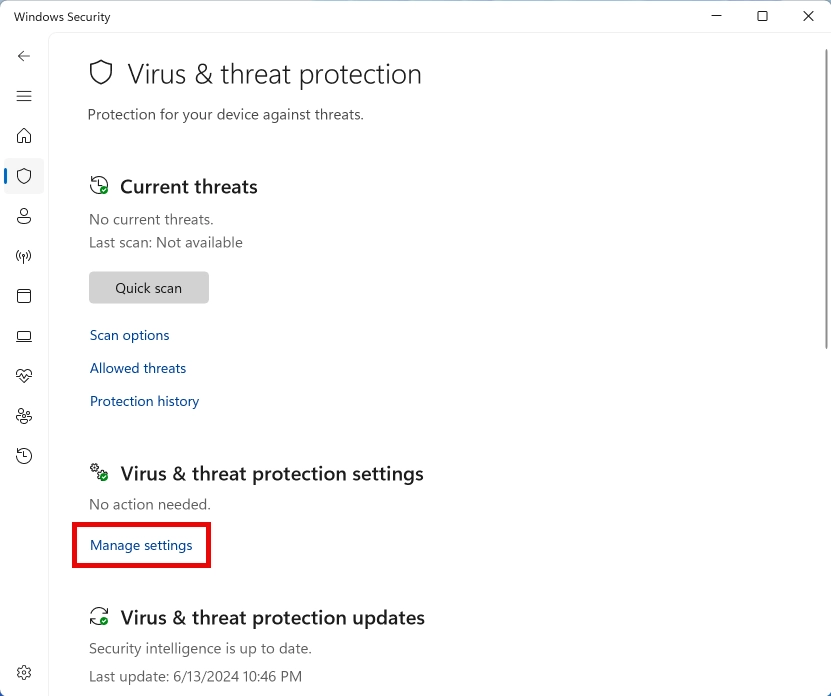
In the opened Windows Defender Security Center, go to “Virus & threat protection” → Virus & threat protection settings.

Scroll the settings down to Exclusions and click “Add or Remove exclusions”. On the opened screen, press Add and Exclusion, select Folder, and paste the path from your clipboard. Click Open, and Windows Defender will not scan the folder where Antimalware Service Executable is located.
Disabling of the On-run Protection
This method is the quickest and a temporary solution, as it disables its background protection until the next system startup. Open Defender, click “Virus & threat protection”, and select “Manage settings”. Switch all the toggles to the “Off” position.
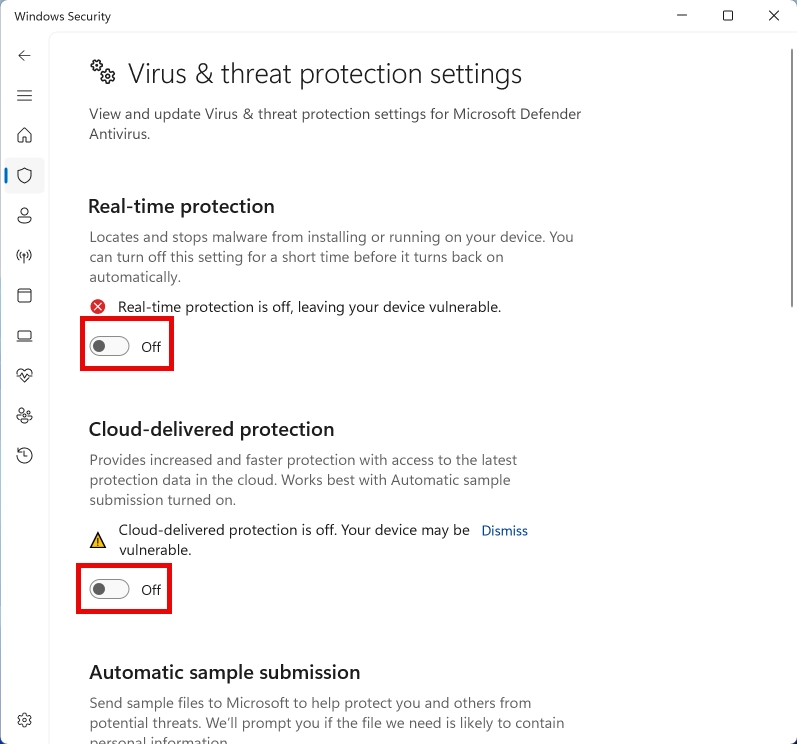
Completely Disable Windows Defender
I strongly advise against completely disabling Defender, as it puts your system at risk. However, if you accept all the risks, follow the instructions carefully, as changing various registry settings can lead to serious system problems.

In the opened Registry Editor, take the following path using the navigation pane on the left side of the window: HKEY_LOCAL_MACHINE\SOFTWARE\Policies\Microsoft\Windows Defender
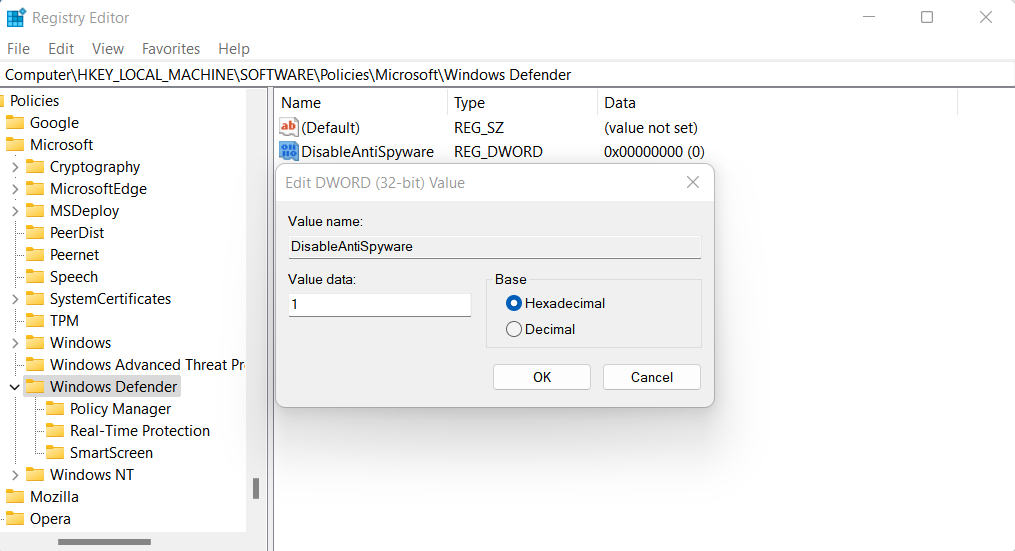
Right-click the right pane of the Registry Editor window and, in the dropdown menu, select: New → DWORD (32-bit) Value. Name this entry DisableAntiSpyware. Double-click the entry and set its value to 1.
Use an Alternative Solution
If you still decide to stop using Windows Defender, you can use alternative solutions from third-party developers. GridinSoft Anti-Malware is an excellent alternative to the standard Windows solution. Moreover, it has several advantages, including optimization—the application consumes a moderate amount of resources during a full scan, allowing for comfortable use even on devices with less powerful hardware.
Additionally, GridinSoft Anti-Malware includes an Internet Security module, which blocks phishing and potentially unsafe websites. Furthermore, using this tool does not require disabling Windows Defender, allowing you to use both solutions simultaneously, complementing each other.


