Vmmem, short for “Virtual Machine Memory“, is a process that indicates the resource utilization by virtual machines on your system. It operates in tandem with virtual machines and remains inactive without any virtual machine activity. However, suppose you observe high CPU and memory consumption by the vmmem process. In that case, your virtual machine is not configured correctly.
Vmmem Process Explained
Vmmem process is commonly found in Windows 10/11 or Windows Server with Hyper-V functionality enabled. The Windows Hypervisor Platform is a feature in Windows that enables virtualization, which allows users to run virtual machines. Vmmem, also known as the Virtual Machine Memory Process, manages the memory usage of virtual machines running on the system. It helps allocate and manage the memory resources the virtual machines require, ensuring efficient utilization of the underlying hardware 1.
During the operation of virtual machines, vmmem.exe may consume CPU and memory resources. The amount of system resources allocated by vmmem.exe depends on the number and activity of the virtual machines running on the system. It is important to note that vmmem.exe is a legitimate Windows process, not a virus or malware. However, if you experience high CPU or memory usage attributed to vmmem.exe, it could indicate resource-intensive actions happening on virtual machines, or misconfigurations that need to be addressed.
What is the Vmmemwsl.exe process?
Vmmemwsl.exe is a stand-alone version of the original Vmmem process that handles the virtualization tasks related to the Windows Subsystem for Linux (WSL). Akin to the “classic” variant, it starts as soon as you start the virtual machine using WSL calls (WSL2 to be more specific). Such differentiation is needed due to the separate layer of compatibility with Linux machines that appeared in Windows back in 2016. You may need to run one during the development process or for testing purposes.
How to Resolve Vmmem High Memory and CPU Usage?
If you are using virtual machines and find the resource usage of vmmem.exe to be excessive, there are several options for you to stick to:
Restart WSL from Command Prompt
WSL (Windows Subsystem for Linux) is integral to Windows 10/11, offering virtualization solutions for users. Among other options, it is the most widely used one, so much so the use of Windows built-in virtualization is almost synonymous to WSL. That being said, it can occasionally contribute to the vmmem high usage issue due to improper setup or operational glitches.
As the most common troubleshooting advice goes, the first step to do in case of any problem is to reboot the thing. Restarting the VM can restore normal operations and fix the excessive memory usage. Here is how you can do it:
1. Open Command Prompt as an administrator by typing “cmd” in the search bar, right-clicking Command Prompt, and selecting “Run as administrator.“
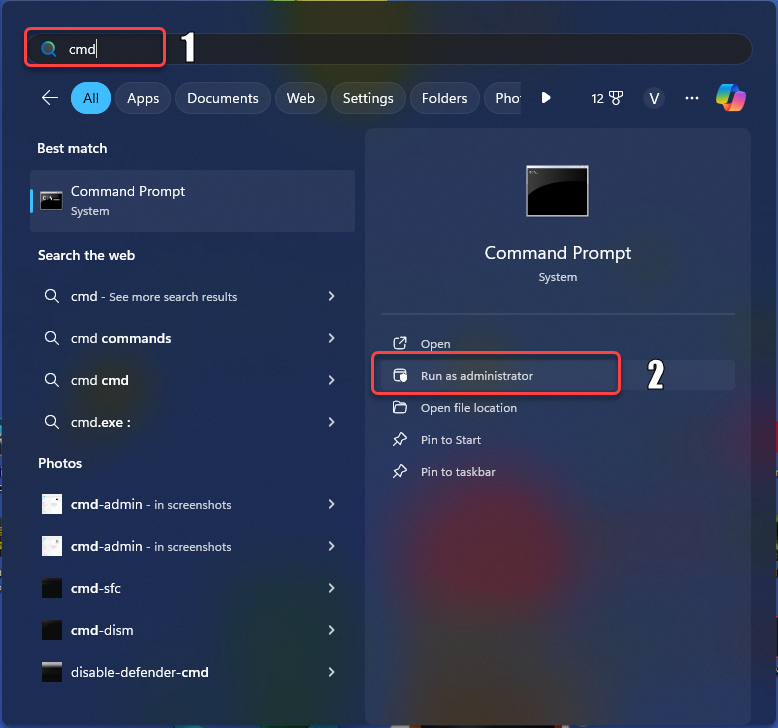
2. Execute the following command to shut down WSL:
wsl --shutdown
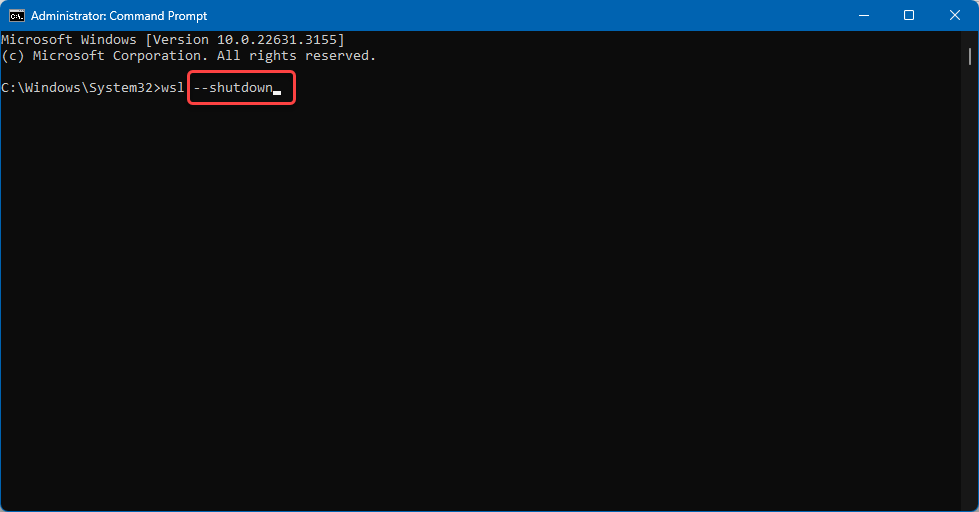
If the command doesn’t work, navigate to the following location in File Explorer:
C:\Users\your-username\.wslconfig
Create a new text file and add the following code:
[wsl2] guiApplications=false
4. Save the file and reboot your PC. Monitor vmmem’s RAM usage in Task Manager after the reboot. The actions from above should stop the VM from running, so you won’t see it pop up again. If you still need to use Linux utilities, you can always start using the WSL service. If the issue persists though, you can run the guide above to stop it.
1.Search for Windows PowerShell in the start menu, right-click, and select “Run as administrator.”
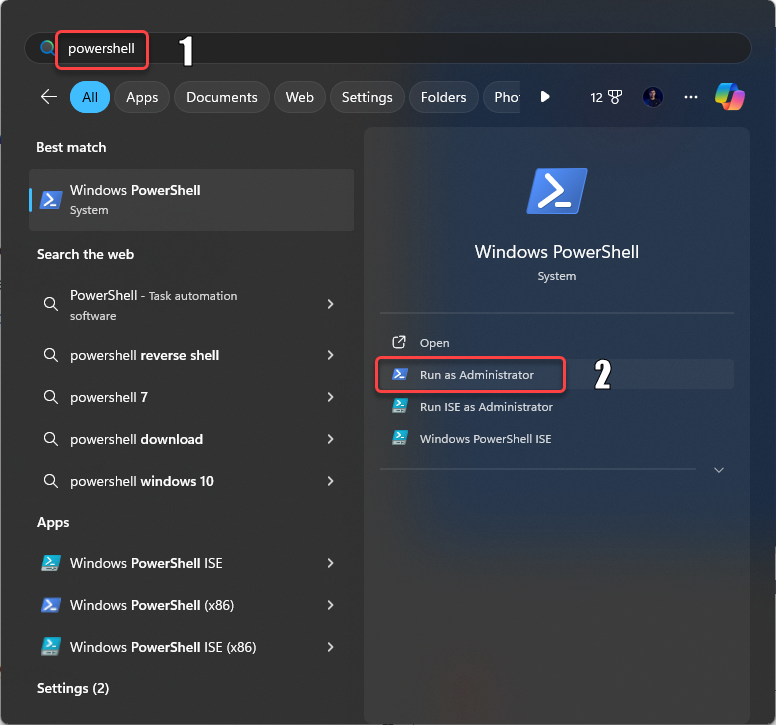
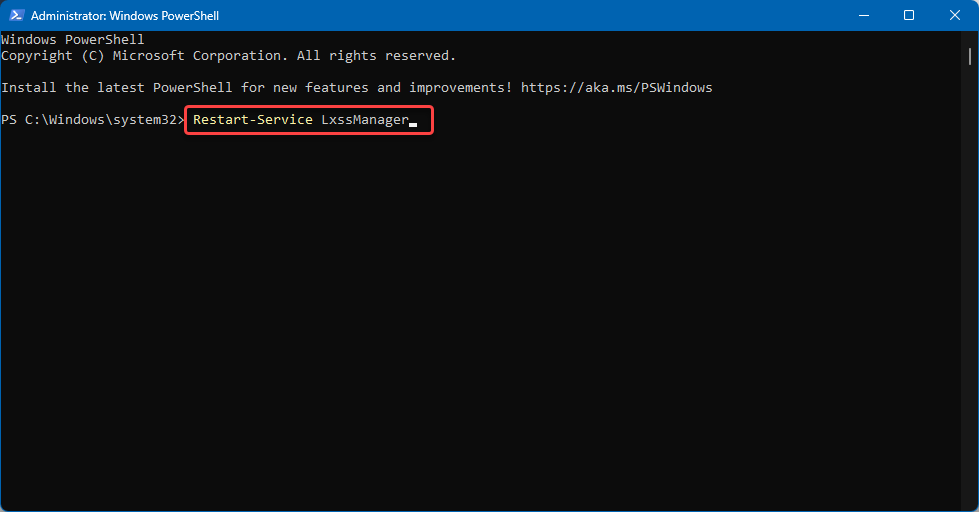
2. Execute the following command to restart the WSL service:
Restart-Service LxssManager
Vmmemwsl.exe Process High CPU & Memory – Fix Guide
Fixing high system resource consumption that comes from vmmemwsl.exe is done through the selection of console commands. It is common to see vmmemwsl process to keep running even after shutting down related environments. At the same time, users complain about this process staying active regardless of their commands and actions. Let’s see how to stop it.
First method I’ve picked is through killing the process using Commadn Prompt. It is likely the most effective one, as it solves even problematic cases – when the WSL process hangs and does not respond, requiring the system reboot to stop working.
Run Command Prompt with Administrator privileges. There, you need to find the ID of the vmmemwsl.exe process. Type the following command:
Tasklist /fo table
There, find the vmmemwsl process and copy its exact name. It may differ from one instance to another, so copying instead of direct typing makes the naming in the following command the most accurate:
TASKKILL /IM %paste_process_name_here% /F
This will stop the process immediately, without any excuses, data saving, or else. Open Task Manager to confirm that the issue is solved. Main downside of this effective method is that it completely ignores data saving and other procedures that help to avoid the issues or malfunctions. If vmmemwsl.exe stopped responding, and you have some unsaved data you are not willing to sacrifice, then try the other method.
One more method is about a graceful shutdown of the WSL though the PowerShell command. Run the PowerShell as administrator and type the following command:
Cmd wsl --shutdown
In this case, shutdown will happen in a normal order, but if something is wrong with the deep VM config, the method may not work. On the other hand, it saves data, so it is always worth trying.
Adjust Virtual Machine Memory Allocation
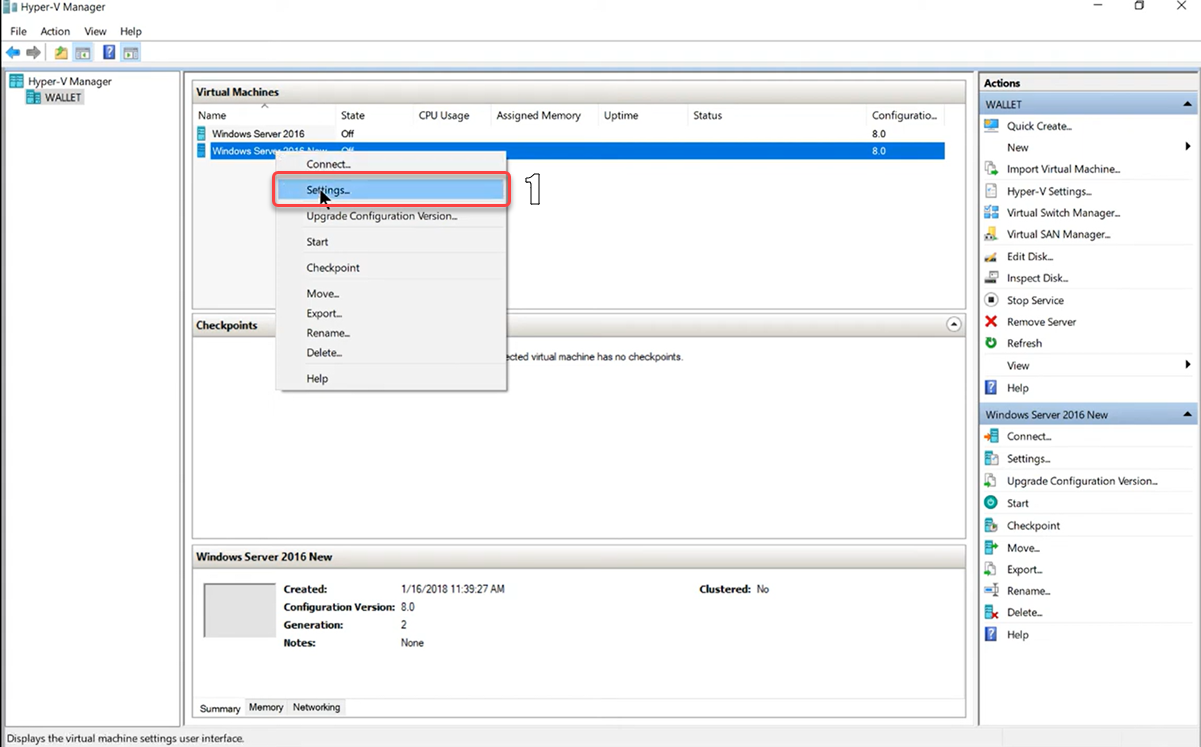
High CPU and memory usage by vmmem may result from excessive RAM allocation to virtual machines. Adjusting virtual machine settings can help mitigate this issue. To configure RAM for a virtual machine on Hyper-V, please open Hyper-V Manager. In the list of virtual machines, select the desired VM. Then right-click the VM and select “Settings”.
In the left pane, select “Memory“. Next, in the “RAM” field, enter the desired amount of memory.
(Optional) Enable dynamic memory:
Select the “Use dynamic memory” checkbox.
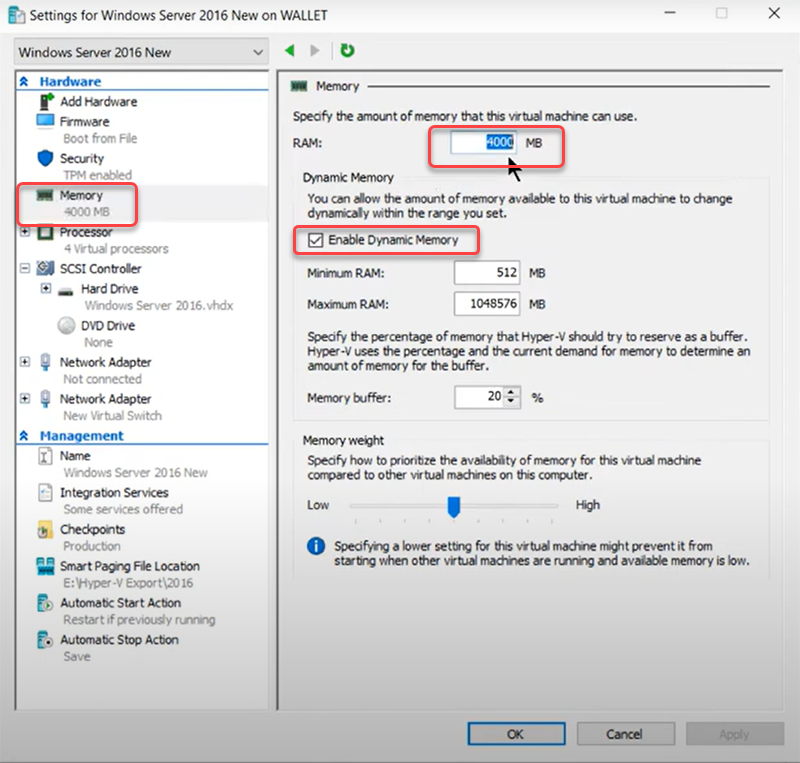
Enter the minimum and maximum amount of memory and click “OK”.
Disable Running Virtual Machines
If previous methods fail to address vmmem high memory usage on Windows 10, consider terminating running virtual machines.
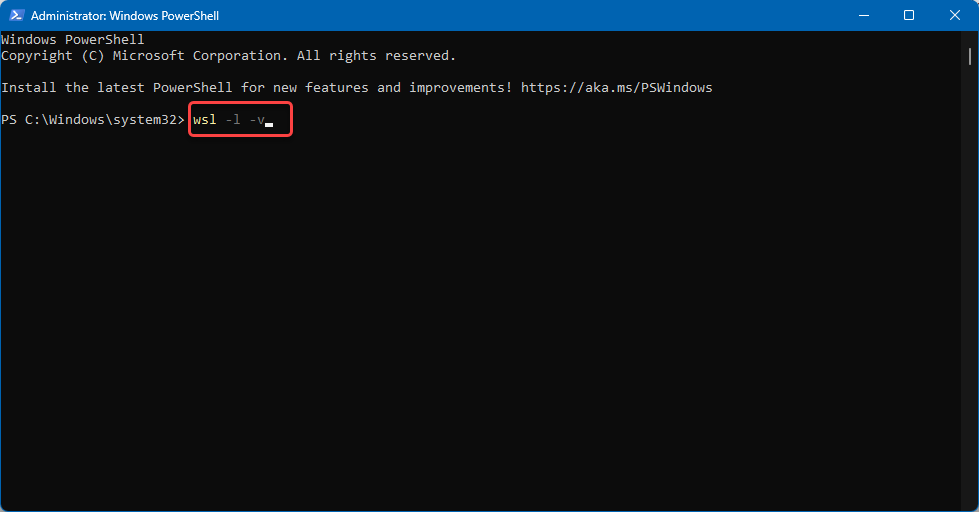
1. Open Windows PowerShell as an administrator by searching for “powershell” in the search bar and running it as an administrator. Here, execute the following command to display a list of running virtual machines:
wsl -l -v
3. Identify the running virtual machines and terminate them using the following command:
wsl -t kali-linux
Note: Replace “kali-linux” with the name of the running virtual machine on your system.
If you’re not using virtual machines actively but experiencing excessive resource usage from vmmem.exe, you have a few options:
-
Stop or suspend virtual machines. You can free up system resources when not using specific virtual machines by stopping or suspending them through virtualization management software or the Hyper-V Manager in Windows.
Disable Hyper-V. If you aren’t using any virtualization features or virtual machines on your system, consider disabling Hyper-V to prevent vmmem.exe from running and using system resources. This process requires administrative privileges and can be done by accessing the “Turn Windows features on or off” settings.
It’s essential to consider the impact on virtual machines before reducing or disabling vmmem.exe, as it may affect their functionality or performance. So, assess your specific requirements before making adjustments.

